

I developed this HDA for my latest game Land of Hatti. Since manually designing maps for open-world would require an immense amount of time I decided to use a procedural approach for map generation and instancing.
A- Biome Map Generation
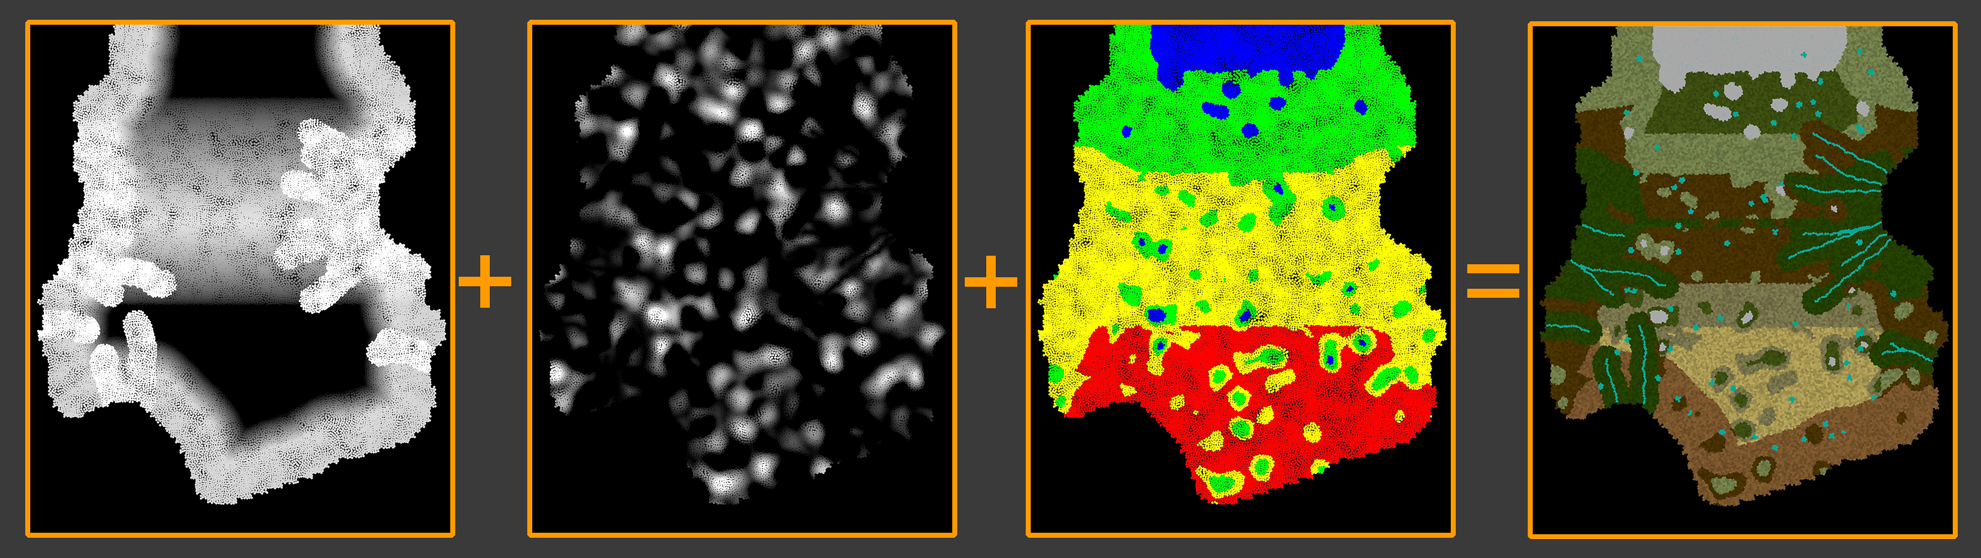
- Height Map Generation
- A procedural height map is created using Perlin noise (
pnoise). - This serves as the foundation for determining elevation, including mountains, plains, and valleys.
- A procedural height map is created using Perlin noise (
- Water Map Creation
- Three types of water bodies are generated:
- Sea: Surrounding land tiles.
- Rivers: Flowing from high-altitude (high precipitation) areas to the sea, following downward slopes.
- Lakes: Formed in specific conditions such as:
- High precipitation regions.
- Volcanic activity on mountain peaks.
- Crater depressions.
- Aeolian (wind-formed) basins.
- Three types of water bodies are generated:
- Humidity Calculation
- Humidity is determined based on:
- Levels of precipitation.
- Proximity to water bodies.
- Humidity is determined based on:
- Temperature Calculation
- Temperature is computed using factors like:
- Latitude: North-South location on the map.
- Distance to Water: Coastal areas are generally cooler.
- Elevation: Higher altitudes have lower temperatures.
- Temperature is computed using factors like:
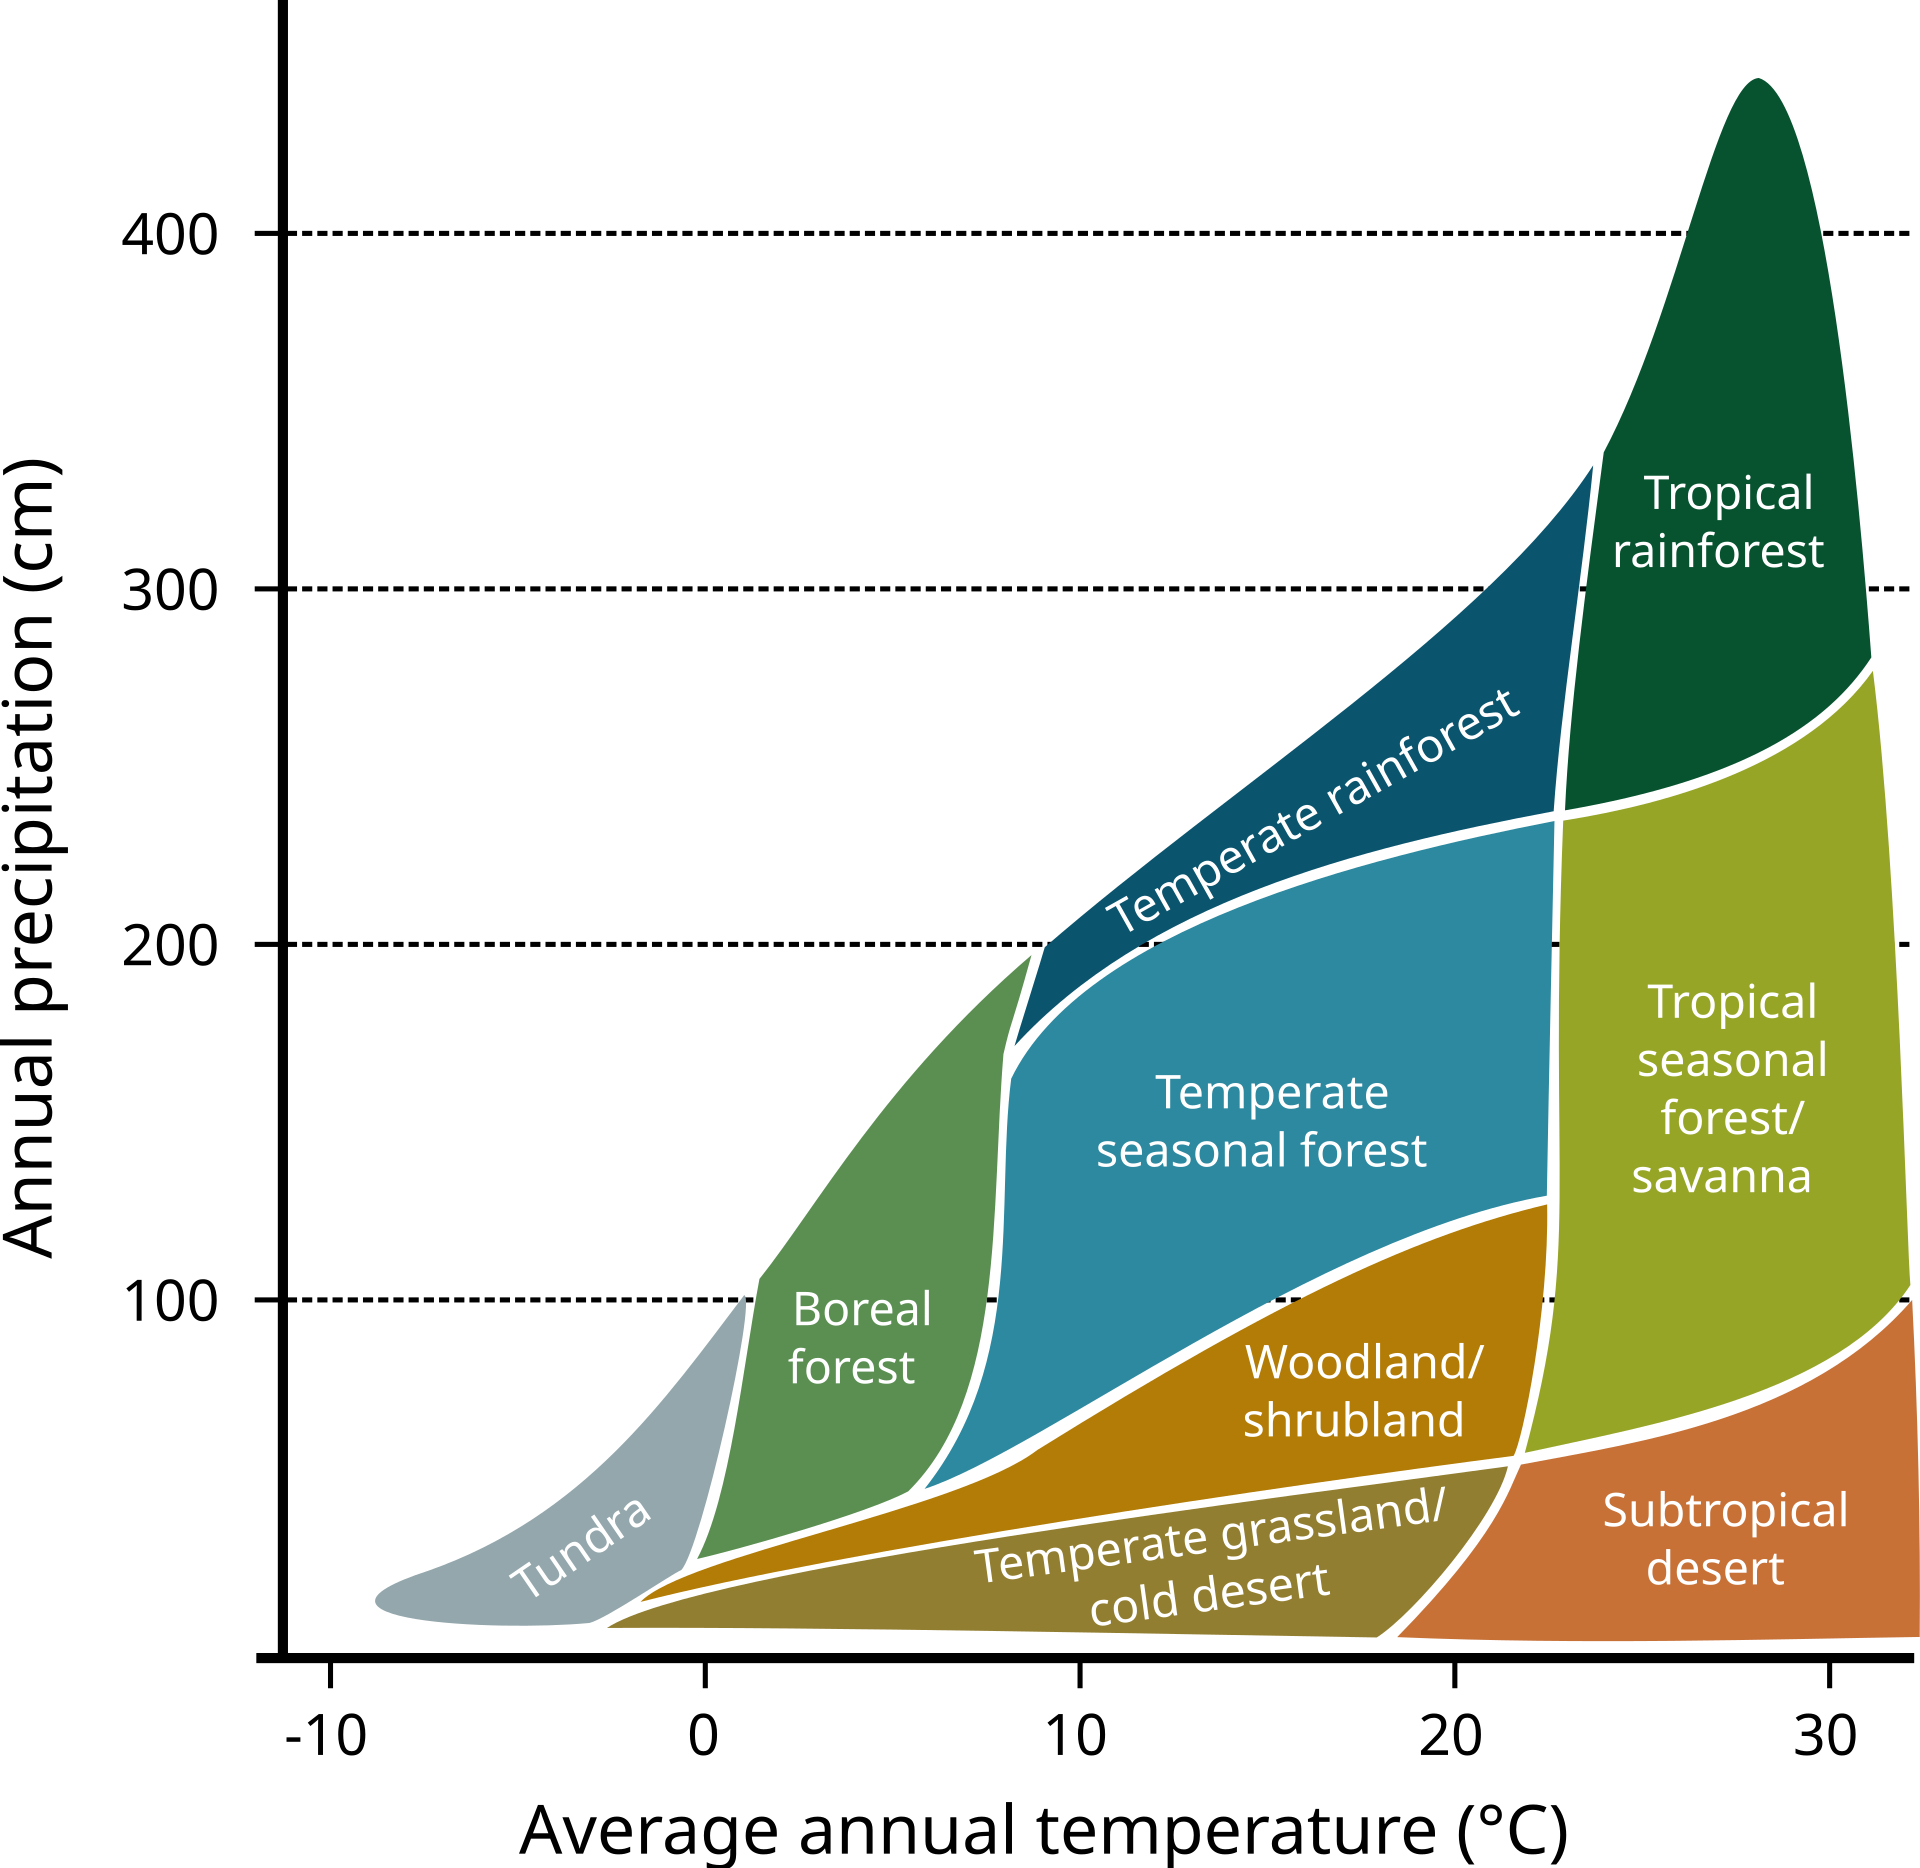
After Temperature and humidity paremeters are calculated, biomes are selected by cross-referencing the a predefined matrix (as illustrated in the image below). This process creates a dynamic and realistic biome map that reflects the natural diversity of ecosystems

B – INSTANCING ASSETS
Once the biome map is assigned, the scattering process begins. This involves placing various assets like trees, grasses, and rocks across the map in a structured, multi-step process.
Scattering Process
- Primary Pass
- Larger, primary objects such as trees and big bushes are scattered first.
- Secondary Pass
- Secondary objects, like grasses, tree-connected elements (e.g., ivy, roots), and flowers, are added in this step.
- Final Pass
- Non-biome-specific objects like rocks, sticks, and debris are scattered.
- Factors such as scatter density, proximity to water, spacing between objects, and occlusions by larger objects are considered to ensure a natural arrangement.
C-EXPORTING WITH UNREAL ENGINE
Scattered assets are exported to Unreal Engine as points with instance data. Each point contains the following information:
s@unreal_instance- Specifies which object to instance, using the full reference directory of the asset in Unreal.
s@unreal_uproperty_CollisionProfileName- Defines the collision profile, such as
"BlockAll"or"NoCollision".
- Defines the collision profile, such as
i@unreal_num_custom_floats- Indicates the number of custom data channels.
- In this case, 4 channels are used:
- The first three represent the base color of the object.
- The fourth channel determines whether the material should use the object’s vertex color or the point color.
Organizing Assets
To maintain consistency, the same asset structure is used in both Houdini and Unreal. The structure follows a logical hierarchy:Root → Trunk → Branch → Twig → Leaf → Variant.
For example, scattering a bush geometry adheres to this organized structure, as shown in the accompanying image.
This approach ensures efficient asset management and a seamless workflow between Houdini and Unreal Engine.

